Archived Cleaning Blog Posts
Bathroom cleaning hacks!
1/14/2020 (Permalink)
 Keep your bathroom clean with these tips!
How to Clean: Bathroom Hacks without Chemicals
Streaks & Spots on Glass
Between the drops of water that splatter on mirrors to those on your glass shower door, the mineral deposits left by water can be annoying. With just a few spritzes of a natural cleaning solution, these streaks can usually be wiped away with a little elbow grease.
Create your own natural cleaning solution with vinegar and water. Fill your spray bottle with one part vinegar to two parts water to make the best shower cleaner. Shake the bottle to mix the two liquids well. Spray your mirror or glass surface and use a clean cloth or newspaper to wipe from top to bottom. Use firm pressure (like with a squeegee) to push all the liquid down and off the surface! If it squeaks, you’ll know it’s clean!
Porcelain and Grout
Porcelain areas of the bathroom pick up gunk over time, so they almost always need a scrub down. Here are some ideas on how to get your grout, sink, or bathtub cleaner without using anything toxic.
- Sprinkle the tub, sink, or grout with baking soda, taking care to reach all areas of the tub. Use a spray bottle filled with vinegar to spray over the desired area and let sit for a few moments. Scrub the area clean with a brush and rinse away with water.
- Sprinkle the area you wish to clean with baking soda and then use a spray bottle of hydrogen peroxide to create a foaming natural scrub instead.
- Heat a ½ cup of vinegar in the microwave until it’s very warm (not boiling) and pour into a spray bottle. Pour a ½ cup of your favorite natural dish soap into the same spray bottle and shake it lightly to mix well. Spray liberally over the desired area, let sit for a few minutes, then simply wipe away.
As you can see, it takes only a few ingredients to keep your bathroom sparkling clean and smelling fresh. These items are often found around the home and easy to buy in bulk if you want to keep them stocked up at home.
Sewer backup is a dangerous thing! Don't try to clean it up yourself.
1/10/2020 (Permalink)
 We can help you make it "Like it never even happened"!
Sewer backup is a troublesome incident that causes a lot of hassle and disruption to daily life – it may not be as destructive as a fire or a tornado, but it presents a variety of health hazards and sanitation issues and may result in considerable property damage and serious personal injury. Therefore, sewage backup has to be dealt with quickly and efficiently – in the event of a sewage spill in your home, you need to evacuate everyone, turn off the power and water supply to the building, and call a plumber and a cleanup specialist to fix the problem.
Depending on the severity of the situation, you may be able to take some steps to limit the damage, salvage your belongings, or even handle the problem yourself. Have in mind though that sewage cleanup is a laborious and dangerous job, so do not undertake the task unless the spill is small and easily manageable.
What to Do After Sewage Backup
Regardless of whether you intend to use professional sewage cleanup services or attempt DIY sewage cleaning, there are some important precautionary measures to take as soon as you notice the problem:
- Evacuate children, seniors, and pets and do not allow them in the affected area until it is restored to a safe condition;
- Contact the utility companies that service your area and have them shut off the electricity, gas, and water supply to your home. If the spill is small and there’s no danger to you, you can turn off the power and water supply yourself (only if the power distribution panel and main water valve are safely above water!) – just make sure you wear appropriate personal protective equipment;
- Open windows to ventilate the area;
- Take any dry, uncontaminated items away;
- Add small amounts of chlorine bleach to standing water – this will ensure some disinfection and prevent bacteria from spreading;
- Notify your insurance company that there has been a sewage backup in your home and make sure you take several pictures of the spill, as well as the water damaged items and structural materials before the cleanup begins (you will need them as proof for your insurance claim).
As already mentioned, cleaning up sewer backup is a difficult, unpleasant, and risky task. Calling professional cleaners is highly recommended.
SERVPRO of Decatur/Forsyth can cleanup your sewage backup. Call us anytime 24/7.
(217) 428-2371
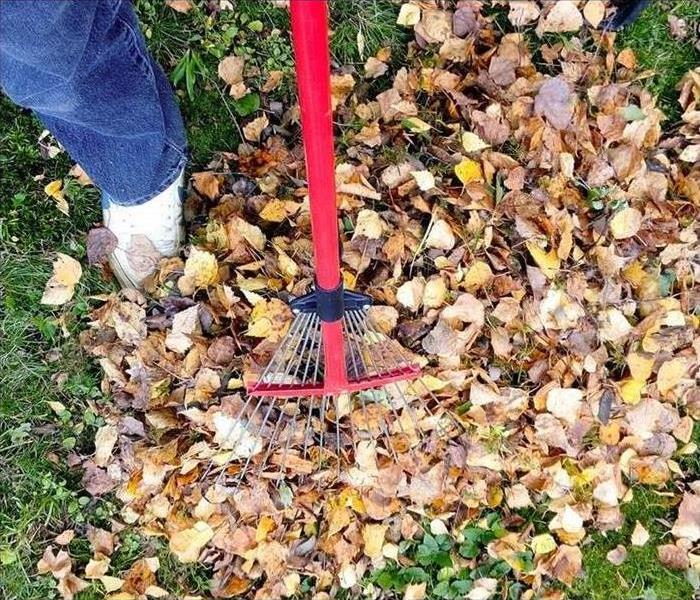
Fall Yard Cleanup
10/10/2019 (Permalink)
 Cleaning up your yard before winter can make for a beautiful yard in the spring.
Fall means football games and visits to the local pumpkin patch. It also means it’s time to get your yard ready for winter. The right preparation now will save you time and energy when spring rolls around, and will keep you and your family safe in the yard year-round. Make sure you get the most out of your yard next year by following our checklist of fall cleanup musts.
1. Clean out debris.
Fallen leaves and weeds are the perfect place for pests to settle in for the winter. Clear out flower beds to keep the critters at bay. Pay special attention to rose beds, as their foliage can foster disease over the winter.
2. Till the vegetable garden.
After the final harvest, pull out old vegetable plants, remove debris, and completely till the whole plot. If you compost, now is the time to add a layer of compost to help nurture your soil for planting next spring.
3. Trim Rogue Branches.
Trim up any large or out-of-place tree branches that may cause trouble during the winter. You don’t want any branches breaking and falling during the snowfall to come.
4. Clean out the gutters.
Not all fall cleanup is in the yard. This is the perfect time to clear leaves and other debris from rain gutters. Check for proper drainage, clear out any blockages with a small garden trowel, and rinse with a hose.
5. Dry everything out.
Drain all water from hoses, fountains, and drip irrigation systems, and store them in a dry place. Water left standing over the winter may damage your equipment.
6. Aerate.
Break up soil to keep water from pooling and guarantee that nutrients will reach the roots over the winter. A garden fork will do the job for small yards, but larger yards may require a walk-behind aerator, which should be available to rent for a reasonable price.
7. Feed the lawn.
Send your yard into winter with the nutrients it needs to survive the long, cold sleep. Add a fall lawn fertilizer with high phosphorous content to encourage root growth and enjoy a lush, green lawn come spring.
8. Rake and mulch.
Don’t let fallen leaves get the best of you; if left unattended they can suffocate the grass. Rake them up, shred them, and use them as mulch for young trees, shrubs, and flower beds. You might even be able to skip the raking part if you use a lawn mower to mulch the leaves in your yard.
9. Prune trees and shrubs.
Trim any dead branches and cut back overgrown trees and bushes. If you have blooming perennials like clematis or roses, now is the time to prune them and train the branches.
10. Give it one last mow.
Set your mower to a low setting and give the lawn a close buzz before winter sets in. This helps the soil dry out more quickly in the spring, which leads to a lusher lawn.
11. Divide and cut back perennials.
If your perennials really took off this year, go ahead and spread the love. Divide plants and add them to other beds where they will also do well. This saves money and time in the spring. Fall-blooming perennials like chrysanthemums shouldn’t be divided now — wait and divide them in the spring.
12. Protect cold-sensitive plants.
Keep sensitive perennials, shrubs, and roses in top shape through the cold days of winter. Add mulch to the base and wrap plants in cloth barriers to prevent damage from freezing. Depending on the hardiness of the plant and your climate, you can use a single sheet or blanket or wrap them in a combination of cloth and plastic.
13. Plant bulbs, shrubs, and fall annuals.
Some plants do best when planted in the fall. If you want to add new shrubs or spring bulbs like hyacinth, now is the time to get them in the ground. Fall annuals like pansies are also a great addition to keep some color in your yard as other plants go to sleep.
14. Protect the deck.
Prevent the growth of mold and mildew by giving the deck a good power wash. If you don’t have a pressure washer, you can rent one from a garden store. Once the deck is clean and dry, add a weatherproofing stain to protect the wood from moisture damage over the winter.
15. Clean tools and store them.
Don’t throw your gardening tools in the shed and forget about them until spring. Take time to give them a good cleaning and add a light coat of oil to prevent rust during the cold season.
If you follow this checklist you’re bound to have a wonderfully winterized yard that will be ready to wow you with lush, green bounty once the warm weather returns.
Tips on how to clean your Stainless steel appliances.
9/5/2019 (Permalink)
 Cleaning your appliances on a regular basis can keep them looking new.
Stainless steel appliances remain popular in American kitchens. In fact, stainless appliances outsell white and black kitchen appliances, with dishwashers, ranges, and refrigerators boasting the stainless look in a big way. (One exception is the top-freezer refrigerator category—most of those sold are white.)
The Basics on Cleaners for Stainless Steel
Avoid using harsh abrasives, scouring powders, steel wool, bleach, and ammonia, all of which can damage the finish.
Stainless Steel Cleaning Tips
Step 1: Dip a soft cloth in warm water mixed with a mild dish detergent. Wipe the surface, rinse the cloth and wipe again, then dry with a towel to prevent water spots.
Step 2: If you still see fingerprints, spray a glass cleaner onto a soft cloth and wipe fingerprints away.
Step 3: To remove baked-on food and grease, make a paste of baking soda and warm water. Gently rub onto the surface using a soft cloth or sponge. Wipe with a clean wet cloth and towel dry. For scratches and stains, use a stainless steel cleaner and apply to the area, following directions. Rinse with a clean damp cloth, then dry.
Shying Away From Stainless?
If having to clean stainless steel lacks appeal, check out other finish options, such as that classic, white.
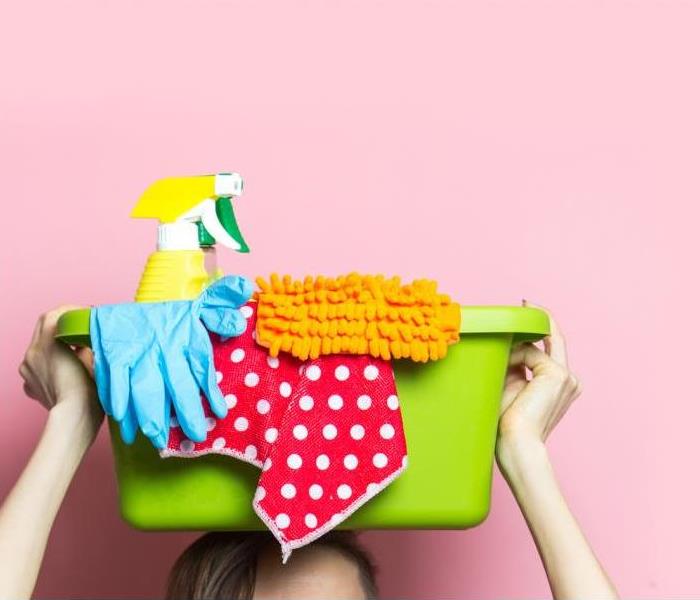
Useful tips for cleaning
9/5/2019 (Permalink)
 Simplify cleaning with these helpful tips!
Here are 5 useful tips for those hard to reach places!
1. Keyboard Cracks
The nooks and crannies beneath the keys of your computer’s keyboard can be tricky to clean, but a sticky note can help! First, turn your keyboard upside-down and tap on it to dislodge any loose crumbs and dirt. Then turn it back over, and run the sticky end of a sticky note in between the keys to pick up any leftover debris.
2. Window Blinds
Dusting your blinds can be a real pain, but using your kitchen tongs can make it much easier! Just grab your kitchen tongs, a couple of microfiber cleaning cloths, and some rubber bands. Wrap the cloths around the ends of your tongs and secure them in place with rubber bands. Use the cloth-covered tongs to quickly clean both the top and bottom of each slat in your blinds.
3. Faucets
The faucets in your kitchen and bathroom can get grimy with deposits, mildew, and bacteria over time. Again, an old toothbrush can be a great tool for scrubbing them clean! The scrubbing action of the toothbrush and a little bit of soapy water will help you clear out all the nooks and crannies.
4. Window Tracks
Your vacuum probably has tools for cleaning crevices, but they may not be useful in every situation. For instance, your crevice tool may not be narrow enough to fit into the tracks of your windows to vacuum them out! In these cases, try using the cardboard tube from the center of a roll of toilet paper. Tape one end to your vacuum hose, then squish the other end until it can fit into your window tracks and other narrow spaces.
5. Air Vents
To quickly clean your air vents, start by vacuuming them to remove any loose dust. Then wrap a microfiber cloth around a butter knife, and use it to remove any dust that’s still stuck between the openings of the vent!
Book your appointment today!
6/1/2018 (Permalink)
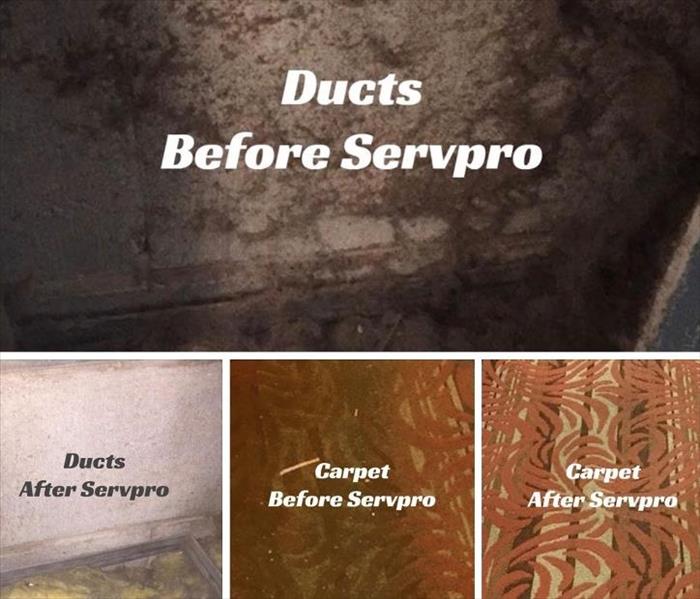
It's June 1st and SERVPRO of Decatur/Forsyth is ready to schedule your duct and/or carpet cleaning. When you book a duct cleaning with us prior to September 1, 2018 we will give you a 10% discount. If you choose to book a carpet cleaning between now and September 1, 2018 you will also receive a 10% discount. Our trained professionals will vacuum, clean, disinfect and deodorize your duct ventilation system. If you are interested in carpet cleaning we will spot treat, deep clean, disinfect and deodorize your carpets. No job is too big or is too mall for SERVPRO of Decatur/Forsyth. For over 27 years, SERVPRO has been your local choice for duct and carpet cleaning services. Interested in other cleaning services SERVPRO has expertise in? We encourage you to call us to find out! We at SERVPRO of Decatur/Forsyth look forward to speaking with you soon.


 24/7 Emergency Service